 ‘Construct 2‘ is a game development suite developed by Scirra Ltd., the same company that created the free, open-source ‘Construct‘ game-making toolset. Having experienced both using other game creation tools and programming video game engines from scratch (Game Makerand Javarespectively), I thought I would try out Construct 2 for myself. In this weekly column, I explore the abilities of Construct 2 and attempt to make several games using the suite. Wish me luck.
 And this is a reason why I thank Scirra Ltd., the creator of Construct 2. Rather than just bundle several written tutorials with the game development suite, the company added simple, fully-working examples of the various games and features that the suite can create and perform. By editing these examples in various ways rather than being attempting to follow their instructional equivalents, I learned my way through the Cosntruct 2 suite and learned what could (and could not) be done with the tools.
From explosions to water fountains to smoke, those demos showed me all of the neat tricks that particle effects could do. They were also very easy to make; just choose the particle effect behaviour, edit some properties, and presto! Your very own particles are displayed in the running layout. However, the particle effects were just that; neat tricks. In practical terms, they were useless features. So I decided to turn down my enthusiasm and be on my digging through the rest of the examples.
 What followed the pathfinding demos were examples of the physics engine that is built into Construct 2. These examples showed nothing out of the ordinary except for a bizarre showcase of a rotating platformer. However, something that was worth taking note about was that literal sprites also act as the 2D models for the physics engine. Simply changing the tool in the custom sprite editor allowed for manipulation of model hooks, which if moved change the barriers in which collisions would occur.
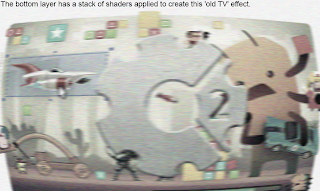
WebGL, for those uninitiated, stands for ‘Web Graphics Library’. Although it could be programmed all by itself to run a game, Construct 2 only used WebGL for distortion effects. And while these effects were neat and could be used to enhance a product, they by no means would help in the creation of a great game.
After all this I came to a conclusion about Construct 2; I liked the potential. While I would not say that the interface is geared for heavy game-producing (I prefer the classic Game Maker in terms of UI), lots of the features of Construct 2 offer are top-notch and easy to perform. Then again, individual pieces do not make a whole. My opinion will only solidify once I have become familiar with the software and put all of the individual pieces together.


